

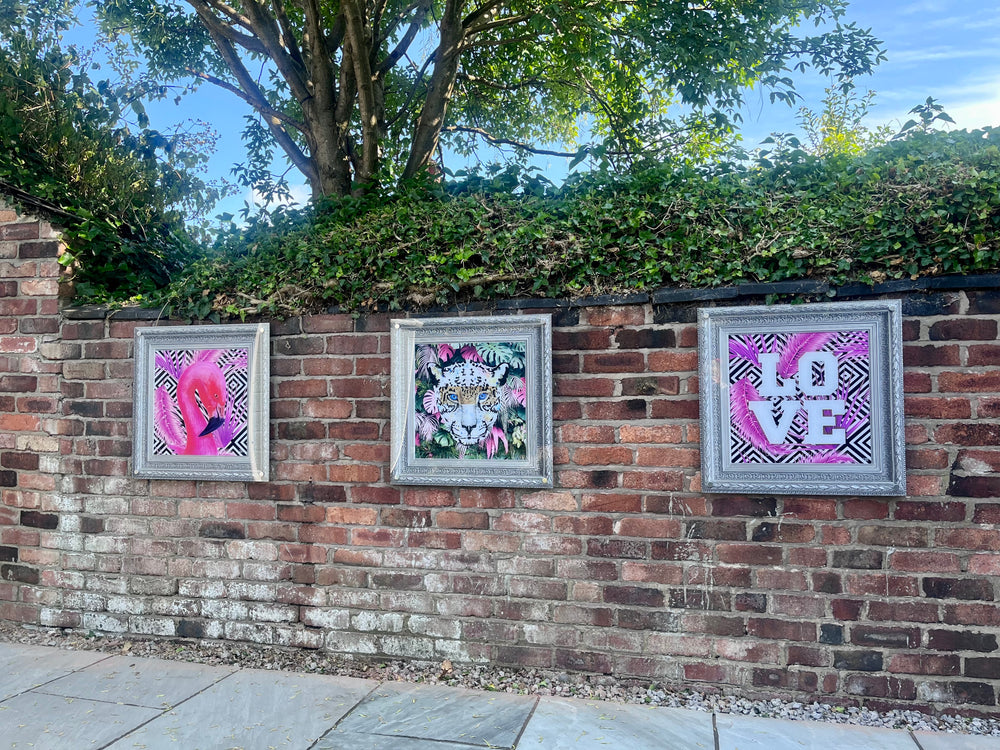
How to Secure Garden Art in Wind with Style
A beautiful garden wall should not become a worry every time the forecast turns blustery. To secure garden art in wind, the aim is not simply to fasten it tightly. It is to choose the right location, mounting method and artwork material so your display feels considered, stays stable and continues to look exceptional after a change in weather.
Outdoor art gives patios, courtyards and garden rooms the finished quality of an interior. But exterior walls have their own demands: gusts funnel through side passages, exposed fences flex, and even a sheltered seating area can catch the wind at an unexpected angle. A little planning before installation protects both your artwork and the surface behind it.
Why Wind Changes How You Hang Outdoor Art
Wind does not act on an artwork evenly. It catches the face of a panel, creating pressure that pulls at every fixing. The larger the piece, the more surface area is exposed. A lightweight decorative item might seem harmless, but repeated movement can loosen screws, wear mounting points and mark the wall over time.
This does not mean large-scale outdoor art is off limits. In fact, a statement piece can be an excellent choice for a bare brick wall or entertaining area. It simply needs to be installed on a suitable surface with fixings designed for the wall and the artwork’s weight. Treat the installation as part of the design, rather than an afterthought.
The position matters as much as the hardware. A wall set back under a pergola or beside a sheltered terrace will experience very different conditions from a fence at the end of an open garden. Before choosing your final spot, spend a windy day noticing where leaves collect, furniture shifts or doors slam. Those small clues reveal the wind paths through your space.
Assess the Wall Before You Secure Garden Art in Wind
The strongest fixing cannot compensate for a weak mounting surface. Start by identifying what you are hanging your art on: solid brick, concrete block, rendered masonry, timber cladding or a fence panel all require a different approach.
Brick and sound masonry are usually the most reliable choices for larger outdoor wall art. Use appropriately sized exterior-grade screws and wall plugs, making sure the plug sits firmly in the brick rather than loose mortar. Mortar joints can crumble more easily, especially on older walls, so fixing into the brick itself is generally the better option.
Rendered walls need a little more care. If the render is cracked, hollow or visibly weathered, avoid using it as the sole support for a substantial piece. A professional installer can advise on a fixing method that reaches the structural wall beneath without damaging the finish.
Timber walls and cladding can provide a secure, warm backdrop for art, provided the timber is sound. Fix into a solid frame or substantial board rather than a thin decorative facing. If you are working with a fence, check for movement first. A panel that sways in a strong breeze will transfer that motion directly to the artwork and its fixings.
For garden walls with uncertain construction, a smaller artwork in a more sheltered location is often the smarter design decision. Scale should suit both the visual setting and the surface supporting it.
Choose Artwork Made for Outdoor Living
An indoor canvas or paper print may look tempting in the moment, but it is not designed for moisture, temperature changes or regular wind exposure. Outdoor art should be made from materials that retain their colour and structure through changing seasons.
Outdoor-grade acrylic artwork offers a polished, contemporary finish while keeping maintenance refreshingly simple. It is water-resistant, UV-resistant and well suited to spaces where sunlight, rain and garden moisture are part of everyday life. The smooth surface also makes it easy to wipe away dust, pollen or splash marks after a busy summer of outdoor entertaining.
Material quality supports secure installation too. A rigid panel holds its shape and distributes its weight predictably across its mounting points. At YARDART UK, outdoor wall art is created for exterior display rather than adapted from indoor décor, giving you the confidence to bring expressive colour, botanicals, abstracts or vintage-inspired imagery into the open air.
Do check the recommended installation guidance supplied with your artwork. The fixing positions, weight and spacing are specific to the design, and following them will give the display its cleanest, most stable finish.
Use Fixings That Match the Setting
Exterior fixings should resist corrosion as well as support weight. Stainless steel screws are a strong choice for many outdoor installations because they are less likely to stain the wall or deteriorate in wet weather. Match the screw, plug and drill bit to your particular wall material rather than relying on a general-purpose packet from the shed.
For a piece with more than one hanging point, use every point provided. Skipping one may save a few minutes, but it allows the panel to twist and puts unnecessary strain on the remaining fixings. Check that all screws are level before fully tightening them, then step back to make sure the artwork sits straight within the wider garden view.
Where an artwork uses stand-off mounts, ensure each one is fitted evenly. These mounts create a refined floating effect, lifting the piece slightly from the wall and allowing water to run away rather than collect behind it. That small gap also prevents trapped moisture and debris from dulling the surface over time.
Avoid relying on adhesive strips, temporary hooks or lightweight picture wire for permanent exterior displays. They may be useful indoors for modest frames, but rain, heat and wind reduce their reliability outdoors. A proper mechanical fixing is the safer choice for a garden setting.
Position Art Where It Can Be Seen and Protected
Shelter does not have to mean hiding the art away. A wall near a dining table, outdoor kitchen or patio doors is often naturally protected by the house while remaining highly visible. This is where art earns its place: it creates a focal point from indoors, frames gatherings and makes an overlooked exterior wall feel intentional.
Consider the artwork’s orientation. A landscape-format piece can echo the long line of a garden wall or fence, while a portrait piece may bring height and colour to a narrow courtyard. In a windy position, placing the art flat and flush to a solid wall is usually preferable to hanging it where it projects into open space.
If your garden is very exposed, use architectural features as allies. Recessed walls, covered terraces, alcoves and side returns all offer quieter locations without sacrificing impact. You can still choose a bold design. The key is giving it a backdrop with enough structure to support it properly.
Make Installation a Two-Person Job
Even when an artwork is manageable to lift, installing it with another person improves accuracy and safety. One person can hold the piece at the desired height while the other checks level, marks fixing points and confirms the composition from a few steps back.
Use masking tape to outline the artwork’s dimensions first. This simple step helps you judge the scale against furniture, planting and doorways before drilling. It is especially useful above an outdoor sofa or dining set, where the piece should feel connected to the zone without sitting too low.
Once mounted, gently test the artwork by applying light pressure near each corner. There should be no rocking, rattling or visible movement. Do not pull sharply or try to recreate storm-force gusts. The purpose is simply to confirm that the fittings are seated correctly and the panel is secure.
Check Your Display Through the Seasons
A well-installed piece should need very little attention, but an occasional inspection is sensible. Check fixings after severe weather, particularly during the first few months after installation. Look for any loosening screws, movement in timber, cracks in render or build-up behind the artwork.
Cleaning is equally straightforward. Use a soft cloth with clean water and, if needed, a mild non-abrasive cleaner. Avoid harsh scouring products that could affect the finish. Keeping the surface clear allows the artwork’s colour and detail to do what it was chosen to do: transform the mood of the space.
If you are redesigning the garden, reassess the artwork’s surroundings too. Mature planting can change airflow, a new pergola may create welcome shelter, and replacing a fence can provide an opportunity to move art to a more secure surface. Outdoor spaces evolve, and your styling can evolve with them.
The best garden art feels effortless because the practical decisions were made well before the first sunny lunch or late-evening gathering. Give your chosen piece a solid wall, quality exterior fixings and a position that respects the weather, then let it bring personality, colour and a finished sense of place to the garden all year round.


Leave a comment